How many platforms you are using to sell your product? Only website. That won’t be enough. Relying only on the website means not grabbing the chance to boost revenue. You can set up shops on platforms like Facebook, Amazon, Instagram, etc. to boost sales and revenue further.
Many businesses, small or large, don’t know how to sell on Facebook successfully. Many would have advised you to do so. But all in vain.
Well, here we are. Today, we are going to explain to you every bit of how and why you should sell on Facebook. Being on a social media platform like Facebook is essential. Because it will help you to expand your business’ reach to new consumers. One more reason to consider this is that, people spend more time on these platforms than your website.
Why sell on Facebook?
First, Facebook is the number one used social platform. Facebook gives you easy access to millions of people around the world. And in this very competitive world of multi-platform business, it is hard to keep up with the pace. Selling on Facebook is a good idea because it just so happens that people spend the majority of their time on Facebook. In fact, on average most people spend around 40+ minutes on Facebook daily. And a good amount of that time goes into shopping, clicking and liking links on Facebook.
That’s why it will be so beneficial for you to sell on Facebook. The shopping platform on Facebook may not give you the features of full-fledged eCommerce platforms like Magento or WooCommerce. But there are enough features available for you to sell and earn profits from it.
Another great thing about the Facebook shopping platform is that you do not need to have an eCommerce website. Facebook allows you to run entire shopping operations from its platform. Also, you will get the following benefits as well.
What are the Benefits of Facebook Shop?
- You can add as many products as you want.
- Mobile-friendly shopping experience.
- You only have to invest time not the actual money.
- You can set up categories and collections to organize all the products.
- Communicate directly with your customers from your Facebook page
- You will get all the stats and analytics about sales and page visits.
- Make your product available on Facebook Marketplace. This will boost your products’ reach to more potential buyers.
The last thing on the above list of benefits is enough for anyone to jump start their eCommerce journey on the Facebook shopping platform. But how do you start?
How do I Setup Facebook Shop?
To set up a shop on Facebook, you need to follow some pre-requisites. First, anyone can create a shop on Facebook and start selling on it right away. And for that, you need a Facebook account and a Facebook business page. Apart from these, you need to follow the below-listed requirements,
- You can only sell physical products. You cannot sell a digital or downloadable product.
- Read carefully and agree to the Merchant Terms of Facebook.
- Link your shop page with a valid bank account.
- Provide a valid tax identification number.
*Tax identification number is only for the US-based stores. For other regions, the tax identification number will vary based on their region.
Once you take care of all these, then you can proceed to set up your shop on Facebook.
-
Configure Facebook shop page
The first thing you need to do is to log in to your Facebook business page. We can assume here that you have admin privileges to operate the page. Once you login you will see the shop page by default. Your customers won’t see it but you will. If it does not appear, then you can locate it from the left panel.
-
Set up your Facebook Shop detail
For US-based shop follow the below guidelines,
- Once you click on the shop tab, a popup will open with a setup process. After reading that click on the Get Started Button.
- Next, you have to fill in the business details and address. Once done click on next.
- In the next step, you will have to select states in which you do business and enter a tax registration number.
- You will have to specify what do you want to sell on Facebook in the next step.
- In the next step, you have to enter your business type and information about your business representative.
- At last, you have to specify shipping options, return policies, and customer service emails.
Additionally, you have to ship an item within three days of receiving an order. Customers should get the order within ten days of making a purchase. You have to use a shipping method that allows order tracking and delivery confirmation. Customers can cancel the order within 30 min if the order is not shipped. And Facebook does not allow you to sell products internationally.
For shops based on the regions other than the US have to follow the below guideline,
Once you click on the Shop tab from the sidebar, it will show you the Merchant Terms and Agreement box. You have to read and agree to all the terms before going further. Once you click on continue, you have to select the checkout method from below listed two methods.
- Message to Buy: This method allows customers to message you directly when they want to buy an item. And it falls upon you to talk to customers and fulfill the orders. This method is great if you don’t have an eCommerce shop of your own.
- Check Out on Another Website: This method is better and more user-friendly. With this method, you can lead your customers to your website to check out the product. This way you can bring traffic from Facebook to your external website.
Choosing from either of the options solely depends on you. If you don’t have an eCommerce store of your own on platforms like Magento or WooCommerce, then you should go with the first option. If you do have an online shop, then go with the second option. For the demo setup, we will go with the second option but the procedure is almost the same if you go with the first option.
Once you click on continue, you will have to choose a currency that will be visible when adding the price of products.
-
Add and Configure Payment Methods
The payment set up depends upon the country of your operation. If you live in the US, then you have an option to link your bank account so Facebook can deposit the funds in that account. Countries other than the US will have to set up payment methods such as PayPal or Stripe.
If you don’t live in the US, then you have to integrate PayPal or Stripe, which is easy and Facebook’s store interface will make it simple for you.
If you live in the US, then follow the setup process for linking your bank account.
First, click on Set Up Payment. A popup will appear asking your tax details. Enter the details carefully because you can’t edit it later. Once you enter all the information accurately, then click on the Save button. In the next and final step, you have to enter the bank details such as Bank Routing Number, Account Number, and Name on Account. Click on save and that’s it, payment set up is complete.
-
Add Products to Your Facebook Shop
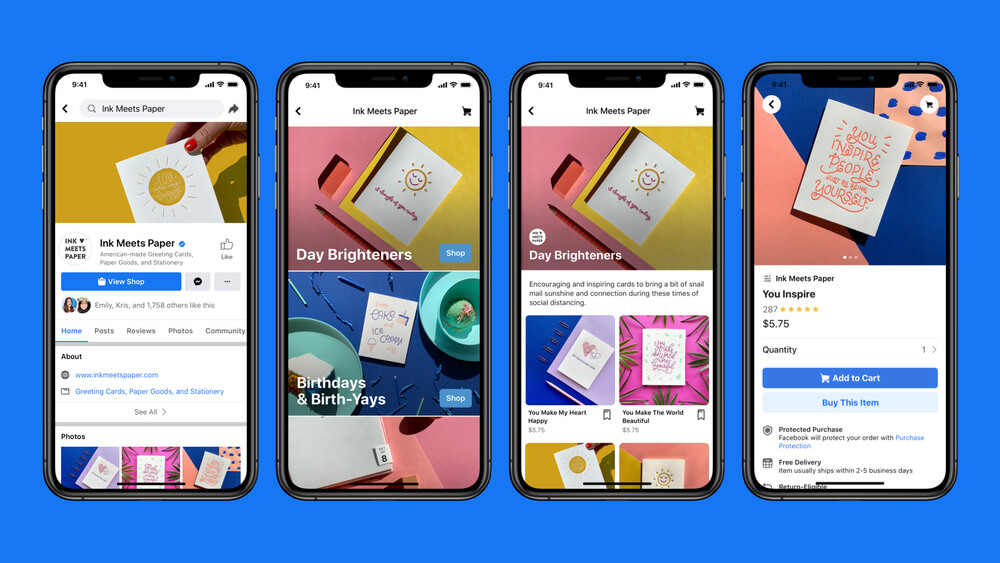
Once all of the above steps are complete, you can add the product by going into the shop tab. A form will appear asking several details when you click on the Add Product button. The form will vary depending on the country.
For the US-based Facebook shop, the form is simple and has options such as,
- Add photos or videos: You must have to add one image of the product. You can add multiple photos and videos as well.
- Name and description: Enter the product name and a compelling description so that customers get enticed to purchase. You can copy the same from your eCommerce site.
- Enter the price of the product.
- Add inventory of the product, which helps you to have a grasp of the product sale.
- Shipping option: Select the shipping method you have configured in the setup process.
- Also, you will have an option to share the product on your page and set the visibility to the public so it appears to anyone interested in it.
For countries other than the US will have an additional option to add a checkout URL. Other details will be the same. The checkout URL will only appear to those shops who have selected the “Checkout on another website” option. This URL will take customers to the product page on your eCommerce site so that they can purchase the product directly from there.
Once all done, click on the Save button to implement everything. You can add as many products as you want by following the same procedure. You can also create a collection of products.
-
Manage your Products
After uploading a number of products, you can see each of them and manage them by going into the shop management panel. Click on Publishing Tools from the top of your Facebook shop page. From the sidebar click on products. A list of products will appear and from there you can edit products or add new ones as well.
-
Manage Orders
The order management feature is not available for Facebook shops worldwide. Currently, it is only available to the US and a couple of other countries.
To manage orders, simply go to Publishing Tools and look for Pending Order in the left sidebar. From here you can manage your orders. Once you click on the Pending Orders, you will be able to see order details and buyer’s info. You can directly communicate to customers and fulfill the order as per their needs.
Conclusion:
So, this is how you do it! From this guide, you have learned how to create a shop on Facebook and what benefits you would get out of it. Facebook is constantly improving its platform for the better. So, after a few months, seeing different options or interface would not be a shocker. If you are still confused about anything related to the Facebook shop or your eCommerce shop, then you can Consult an eCommerce Expert.